1.はじめに
Android で画像を角丸化したいのですが、
何か属性をいじればサクッとできるのかと思いきやちょっと手間がかかりました!
(iOSならサクッとできるのに!)
ということで本ポストでは MaterialCardView を使って画像を角丸化する手法をまとめます。
参照: Android Developers: MaterialCardView
2.前提条件
Mac: macOS Big Sur 11.5.1
Android Studio: Arctic Fox | 2020.3.1 Patch 3
Gradle: 7.0.2
3.事前準備: まず素の画像を表示する
レイアウトXML に以下のように記述します。
<?xml version="1.0" encoding="utf-8"?>
<androidx.constraintlayout.widget.ConstraintLayout xmlns:android="http://schemas.android.com/apk/res/android"
    xmlns:app="http://schemas.android.com/apk/res-auto"
    xmlns:tools="http://schemas.android.com/tools"
    android:layout_width="match_parent"
    android:layout_height="match_parent"
    tools:context=".MainActivity">

    <ImageView
        android:id="@+id/imageView"
        android:layout_width="200dp"
        android:layout_height="200dp"
        app:layout_constraintBottom_toBottomOf="parent"
        app:layout_constraintEnd_toEndOf="parent"
        app:layout_constraintStart_toStartOf="parent"
        app:layout_constraintTop_toTopOf="parent"
        app:srcCompat="@drawable/sample_image" />

</androidx.constraintlayout.widget.ConstraintLayout>
シンプルに200×200 の画像を画面中央に配置するレイアウトです。
エミュレータで見るとこんな感じです。
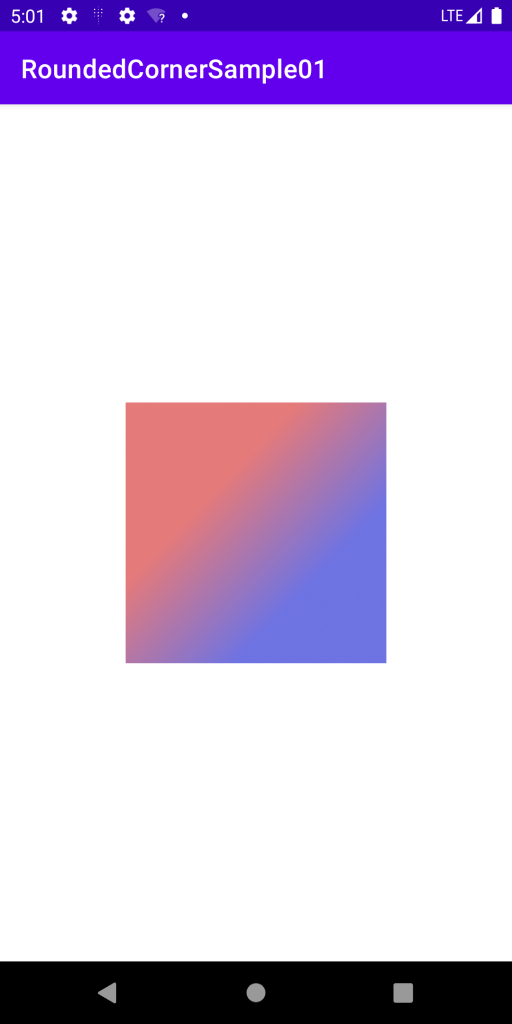
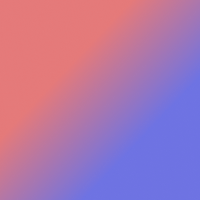
ちなみに画像は以下を「sample_image」というリソース名でプロジェクトに追加しています。
(必要なら自由に使ってください)
画像の追加方法がうろ覚えな方は、例えば本ブログの
Web-y.dev: [Android] プロジェクト作成からViewBinding を使って画像表示するまでをまとめる
を参考にしていただければと思います。
4.角丸化する
いよいよ角丸化します。
冒頭で言った通り、MaterialCardView を使って丸くします。
レイアウトXMLを以下のように編集します。
<?xml version="1.0" encoding="utf-8"?>
<androidx.constraintlayout.widget.ConstraintLayout xmlns:android="http://schemas.android.com/apk/res/android"
    xmlns:app="http://schemas.android.com/apk/res-auto"
    xmlns:tools="http://schemas.android.com/tools"
    android:layout_width="match_parent"
    android:layout_height="match_parent"
    tools:context=".MainActivity">

    <com.google.android.material.card.MaterialCardView
        android:layout_width="200dp"
        android:layout_height="200dp"
        app:cardCornerRadius="40dp"
        app:layout_constraintBottom_toBottomOf="parent"
        app:layout_constraintEnd_toEndOf="parent"
        app:layout_constraintStart_toStartOf="parent"
        app:layout_constraintTop_toTopOf="parent">

        <ImageView
            android:id="@+id/imageView"
            android:layout_width="200dp"
            android:layout_height="200dp"
            app:srcCompat="@drawable/sample_image" />
    </com.google.android.material.card.MaterialCardView>

</androidx.constraintlayout.widget.ConstraintLayout>
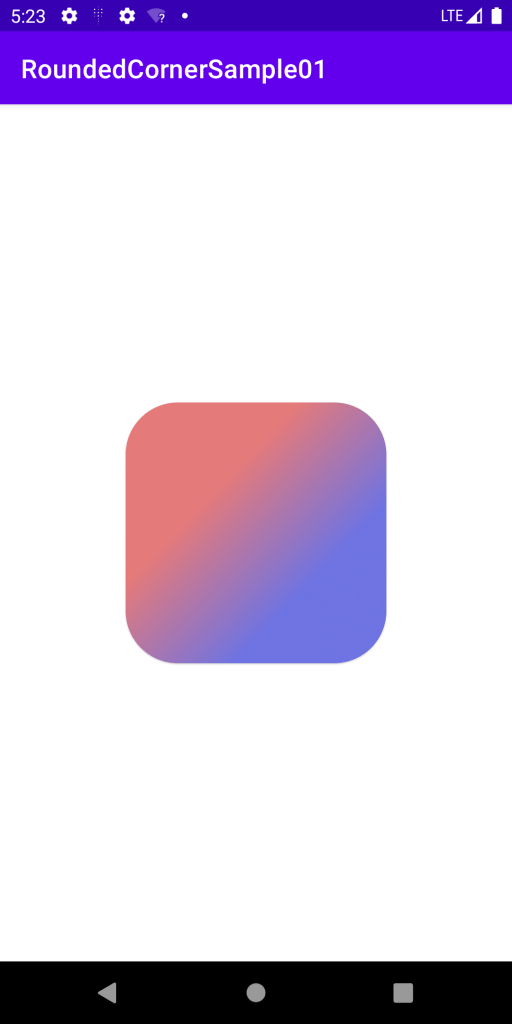
ImageView に一枚 MaterialCardView のレイヤーを被せてやるイメージです。
そうすると以下のように画像が角丸になりました!
一点注意点として、アプリのテーマが MaterialComponents かその子テーマでない場合、
エラーが発生することがあるようです。
その場合は以下のようにMaterialComponents などのテーマを指定すれば回避できるかと思います。
android:theme=”@style/Theme.MaterialComponents.Light”
参考: Stack Overflow: https://stackoverflow.com/a/61244323
また、MterialCardView は FrameLayout を継承しています。
そのため、画像の親要素が FrameLayout だった場合は、
基本的にはそれを MaterialCardView に変更するだけで角丸化に対応できるかと思います。

5.さいごに
iOS だと
View.layer.cornerRadius
のように一行噛ませるだけで角丸化できたので、
それよりは手間がかかりますね😇
以上です。
お疲れ様でした!
